POSITECTOR RTR Replica Tape Reader - Digital spring micrometer
The PosiTector Replica Tape Reader (RTR) is a hand-held electronic instrument that measures burnished TestexTM Press-O-FilmTM replica tape to produce peak-to-valley surface profile height measurements.
It consists of a body (Standard or Advanced) and probe. This digital spring micrometer measures and records peak to valley surface profile height using replica tape.
Replica Tape provides a simple way to obtain an impression of a surface for analysis. It consists of a layer of crushable plastic micro foam affixed to a 50.8 μm incompressible polyester film. When compressed against a roughened surface, the foam collapses and acquires an impression, or reverse replica, of the surface. It is available in a number of grades to accommodate measurements in different profile ranges.
Placing the compressed tape (replica) into the PosiTector RTR gives a measure of the average maximum peak-to-valley height of the surface roughness profile.
Conforms to ASTM D4417, ISO 8503-5, NACE SP0287, SSPC-PA 17, SSPC-SP5, SP6, SP10, SP11-87T, and others.
These norms refer to various standards and specifications related to surface preparation for painting and coating applications:
-
ASTM D4417: Standard Test Methods for Field Measurement of Surface Profile of Blast Cleaned Steel. This standard provides procedures for determining the surface profile of a blasted steel surface using various methods, such as replica tape, depth micrometers, and laser profilometers.
-
ISO 8503-5: Preparation of steel substrates before application of paints and related products - Surface roughness characteristics of blast-cleaned steel substrates - Part 5: Replica tape method for the determination of the surface profile. Similar to ASTM D4417, this ISO standard outlines methods for determining surface profile characteristics of blast-cleaned steel using replica tape.
-
NACE SP0287: Standard Practice for the Use of Coating Service Level Designations on Chemical Process Equipment. This NACE standard provides guidelines for designating coating service levels based on the anticipated corrosion conditions in chemical process equipment.
-
SSPC-PA 17: Procedure for Determining Conformance to Steel Profile/Surface Roughness/Peak Count Requirements. This standard is issued by the Society for Protective Coatings (SSPC) and outlines procedures for determining compliance with specific surface profile/surface roughness requirements.
-
SSPC-SP5: White Metal Blast Cleaning. This SSPC standard defines the requirements for white metal blast cleaning of steel surfaces, providing a specific level of cleanliness and surface profile for coating applications.
-
SSPC-SP6: Commercial Blast Cleaning. This standard outlines the requirements for commercial blast cleaning of steel surfaces, achieving a lower level of cleanliness and surface profile compared to SSPC-SP5.
-
SSPC-SP10: Near-White Blast Cleaning. This standard specifies requirements for near-white blast cleaning of steel surfaces, falling between SSPC-SP5 and SSPC-SP6 in terms of cleanliness and surface profile.
-
SSPC-SP11-87T: Power Tool Cleaning to Bare Metal (St. Louis Testing Laboratories). This technology guide provides information on power tool cleaning methods to achieve a bare metal surface prior to coating.
These standards and specifications are commonly referenced and followed in industries where surface preparation and coating application are critical, such as manufacturing, construction, marine, and oil and gas sectors. Adhering to these standards ensures a consistent and appropriate surface condition, which is vital for the successful adhesion and performance of protective coatings.
Features
- Automatically subtracts the 50.8 µm incompressible substrate from all readings
- Solvent, acid, oil, water and dust resistant—weatherproof
- Measures height (H) and linearized height (HL) (see green inset)
- Mils/Microns switchable
- Every stored measurement is date and time stamped
- Minimizes inspector workload by reducing the number of replicas needed to ensure accuracy
- Two year warranty on body and probe
- Conforms to national and international standards including ISO and ASTM
- Selectable display languages
- Software updates via the internet keep your gage current
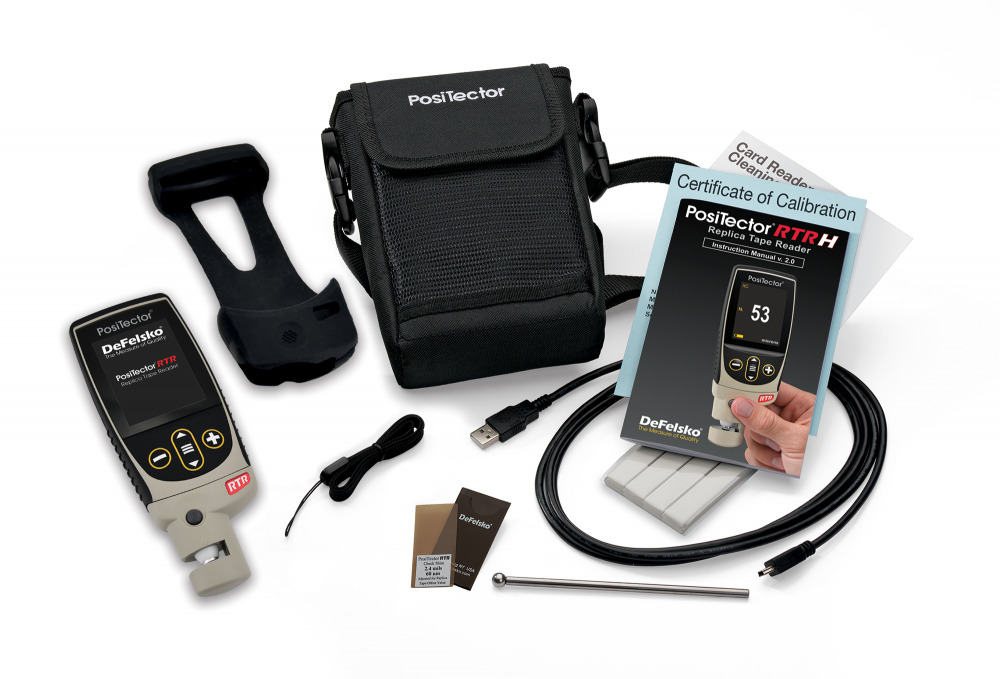
PosiTector RTR Kit includes:
- PosiTector body (Standard or Advanced)
- PosiTector probe (RTR-H)
- Stainless steel burnishing tool
- Cleaning cards (5)
- Surface cleaning putty
- Check shim
- Protective lens shield
- Wrist strap
- 3 AAA alkaline batteries
- Quick Guide instruction booklet
- Protective rubber holster with belt clip
- Nylon carrying case with shoulder strap
- USB Cable
- Certificate of Calibration traceable to NIST
- PosiSoft.net account
Easy-To-Use
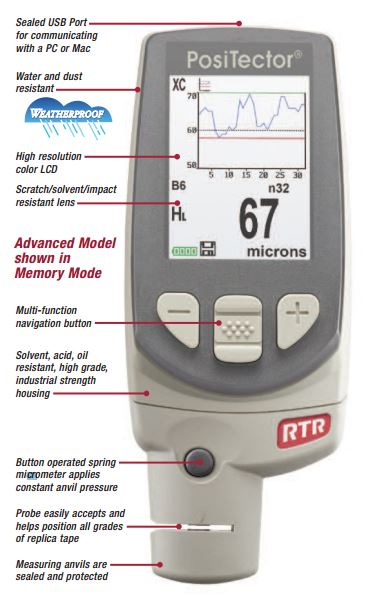
- One-handed menu navigation
- RESET feature instantly restores factory settings
- Automatically subtracts the 50.8 µm (2 mil) incompressible substrate from all readings
- Minimizes inspector workload by reducing the number of replicas needed to ensure accuracy
Durable
- Solvent, acid, oil, water and dust resistant - weatherproof
- Wear-resistant probe tip
- Shock-absorbing, protective rubber holster with belt clip
- Two year warranty on gage body AND probe
Accurate
- Measures height (H) and linearized height (HL) (see green inset
- Certificate of Calibration showing traceability to NIST included
- Check Shim provided to verify accuracy
- Conforms to national and international standards including ISO and ASTM
Versatile
- Fully interchangeable probes are compatible with ALL gage bodies
- Selectable display languages
- Hi Contrast backlit display for bright or dark environments
- Flip display enables right-side-up viewing
- Mils/Microns switchable
- Uses alkaline or rechargeable batteries (built-in charger)
Powerful
- Statistics mode continually displays/updates average, standard deviation, min/max thickness and number of readings while measuring
- Every stored measurement is date and time stamped
- Screen Capture—record and save screen images into memory for record keeping and review
- USB port for fast, simple connection to a PC and to supply continuous power. USB cable included
- PosiSoft USB Drive—stored readings and graphs can be accessed using universal PC/Mac web browsers or file explorers. No software required
- Software updates via web keep your gage current
- Connects to PosiTector.net
Probe - Feature Comparison Chart
| Feature Comparison Chart | Standard (1) |
Advanced (3) |
| Hi Contrast LCD Display | 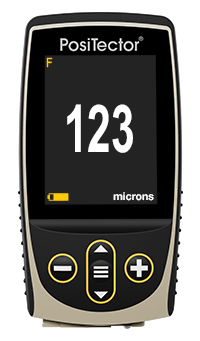 Color |
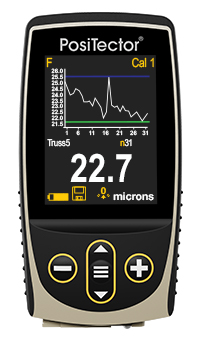 Color |
| General Features | Standard (1) |
Advanced (3) |
| FAST mode - faster measurement speed for quick inspection | ||
| SCAN Mode - take continuous readings without lifting the probe | - |
|
| Hi-Lo limits audibly and visibly alerts when measurements exceed your specified limits |
|
|
| Instantly calculate average, standard deviation, min/max thickness and number of readings while measuring |
|
|
| Onscreen help, real time graphing, picture prompting and batch notes | - | |
| Memory Features & Capacity | Standard (1) |
Advanced (3) |
| Reading Storage Capacity | 1000 in one group | 250,000 in up to 1000 groups |
| Create meaningful batch names and enter notes directly on the instrument using a familiar on-screen QWERTY keyboard. | - | |
| SSPC PA2 feature set determines if film thickness over a large area conforms to user-specified min/max levels | - | |
| PSPC 90/10 feature determines if a coating system complies with an IMO performance standard for protective coatings | - | |
| Multiple stored calibration adjustments for measuring on a variety of substrate conditions | - | |
| Connection Options | Standard (1) |
Advanced (3) |
| USB port for fast, simple connection to a PC and to supply continuous power. USB cable included | ||
| WiFi technology wirelessly synchronizes with PosiSoft.net, downloads software updates, and connects to mobile devices for expanded functionality | - | |
| Bluetooth Wireless Technology for data transfer to a PC or optional portable printer | - | |
| PosiSoft Solutions | Standard (1) |
Advanced (3) |
| PosiSoft Desktop Software Desktop software for PC or Mac computer | ||
| PosiSoft USB Drive Access your PosiTector as a flash drive. View and print readings and graphs using universal PC/Mac web browsers or file explorers | ||
| PosiSoft.net (formerly PosiTector.net) Cloud-based application offering centralized management of PosiTector readings | ||
| PosiSoft Mobile Gage-based software application featured in all PosiTector Advanced instruments | - |
Prepare the test surface
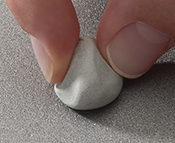 Locate a representative site for measurement. Clean the surface to be tested.
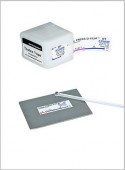
We recommend the use of cleaning putty to remove dust, debris, or residual blast media from the surface.
Firmly press the putty onto the surface using your fingers, and remove.
Burnish the replica tape (create a replica)
Select the appropriate grade of replica tape based on the target profile (Coarse or X-Coarse). See tape instructions for assistance.
Pull a single adhesive-backed replica tape free of its release paper. A "bull's eye" circle of paper should remain on the release paper (it is not used for measurement).
Apply replica tape to blasted surface. Press the adhesive-backed ends of the paper to hold it firmly in place during the burnishing process.
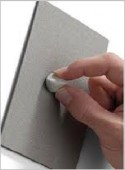
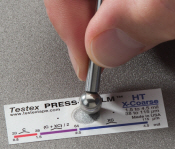 Firmly compress replica film using the rounded end of the included stainless steel burnishing tool. Apply sufficient pressure in a circular and x-y rubbing motion to produce a replica with a uniform pebble grain appearance. It normally takes 30 to 60 seconds to fully compress all parts of the film on most surfaces. In general, too much compression is safer than too little.
After burnishing is complete, remove the replica tape from the surface.
Prepare the PT-RTR
Clean the measurement surfaces (anvils) using the included cleaning card. Swipe the card through the opening a few times while firmly pressing both probe buttons to remove dust particles and residual tape adhesive.
 Power-up the PosiTector RTR by pressing the center navigation button. An image appears indicating that the probe requires zeroing.
Simultaneously press and hold both probe buttons firmly until the Gage beeps and the arrows point outward. Do not place anything in the measurement opening during this procedure.
Measure the included check shim to verify accuracy.
Ensure the correct grade of replica tape, C or XC, is displayed in the upper left corner of the LCD.
Insert the burnished replica tape into the measurement opening. Ensure the tape is properly positioned so that the burnished region is centered within the opening in the probe with the adhesive (sticky) side down.
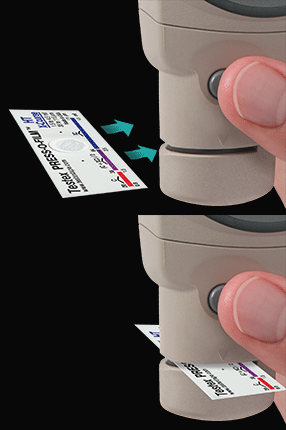
To position the tape, move the Testex™ Press-O-Film™ replica tape to the back of the probe and align the two dots (printed on replica tape) with arrows on both sides of the measurement opening.

If you are using older Testex™ Press-O-Film™ replica tape that does not have the printed dots, simply align by centering the tape within the measurement opening.
Once positioned, firmly press both probe buttons simultaneously and hold until the PosiTector RTR beeps and the measurement is displayed. During measurement, a constant anvil pressure is applied to the replica tape regardless of how hard the two buttons are pressed.
The PosiTector RTR automatically subtracts the 50.8 µm (2 mil) of incompressible polyester film. No further adjustments are required.
 Replica Tape provides a simple way to obtain an impression of a surface for analysis. It consists of a layer of crushable plastic micro foam affixed to a 50.8 µm (2 mil) incompressible polyester film. When compressed against a roughened surface, the foam collapses and acquires an impression, or reverse replica, of the surface. It is available in a number of grades to accommodate measurements in different profile ranges.

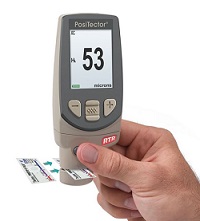 Placing the compressed tape (replica) into the PT-RTR gives a measure of the average maximum peak-to-valley height of the surface roughness profile.
The gage automatically subtracts the thickness of the polyester substrate from all measurements.
Accessories
Replica Tape Press-O-Film
- Coarse / R-Press = 20 to 64 microns
- X-Coarse / R-Pressx = 40 to 115 microns
- Layer of crushable plastic micro foam affixed to a 50.8 µm incompressible polyester film
- 50 pieces (impressions) per roll
More details
Surface Cleaning Putty
- Cleaning dough
- 1 package = 5 pieces
- For cleaning the test surfaces
More details
Specifications
| Measuring principle: | Digital spring |
| Display | Backlit & Reversible LCD |
| Data Output | IR & USB - "1" & "3" Models Bluetooth - "3" Models |
| Measurement Range | 20 to 115 µm |
| Accuracy (H) | ± 5 µm |
| Resolution | ± 1 µm |
| Anvil Diameter | ⌀6.3 mm |
| Anvil Pressure | 110 grams-force (1.1 Newtons) |
| Dimensions | 152 mm x 61 mm x 28 mm |
| Weight | 140 g without batteries |
| Warranty | 2 years |
Buy Now
Availability: Available: 1 - 3 days, Delivery time: 1 - 3 weeks, special order request


